Teams & Organizations
The WYRE MCP Gateway lets you create a team, share vendor credentials across members, and connect Claude to your MSP tools — all through a single dashboard.
Overview
Every user on the gateway belongs to an organization (team). Organizations are on a plan (Pro, Business, or Enterprise) that determines available features:
| Feature | Pro | Business | Enterprise |
|---|---|---|---|
| Users | Up to 3 | 5+ | Custom |
| Personal vendor connections | 3 / user | Unlimited | Unlimited |
| Team (shared) credentials | 5 | Unlimited | Unlimited |
| Invite links | Yes | Yes | Yes |
| Audit logging | — | Yes | Yes |
| SSO / SAML | — | — | Yes |
See Pricing for full plan comparisons.
Getting Started
- Sign in at mcp.wyre.ai/auth/login using your work email.
- You'll land on the Settings dashboard where you can create a team and connect vendors.
Step 1: Create a Team
On the Settings page, you'll see a Team section. Enter a team name and, optionally, an invite code to unlock the Pro plan immediately.
- Type your team name (e.g., your company name)
- If you have an alpha invite code, enter it in the second field
- Click Create a Team
Teams created with a valid invite code are automatically upgraded to the Pro plan. Without a code, you can choose a plan from Settings → Billing.
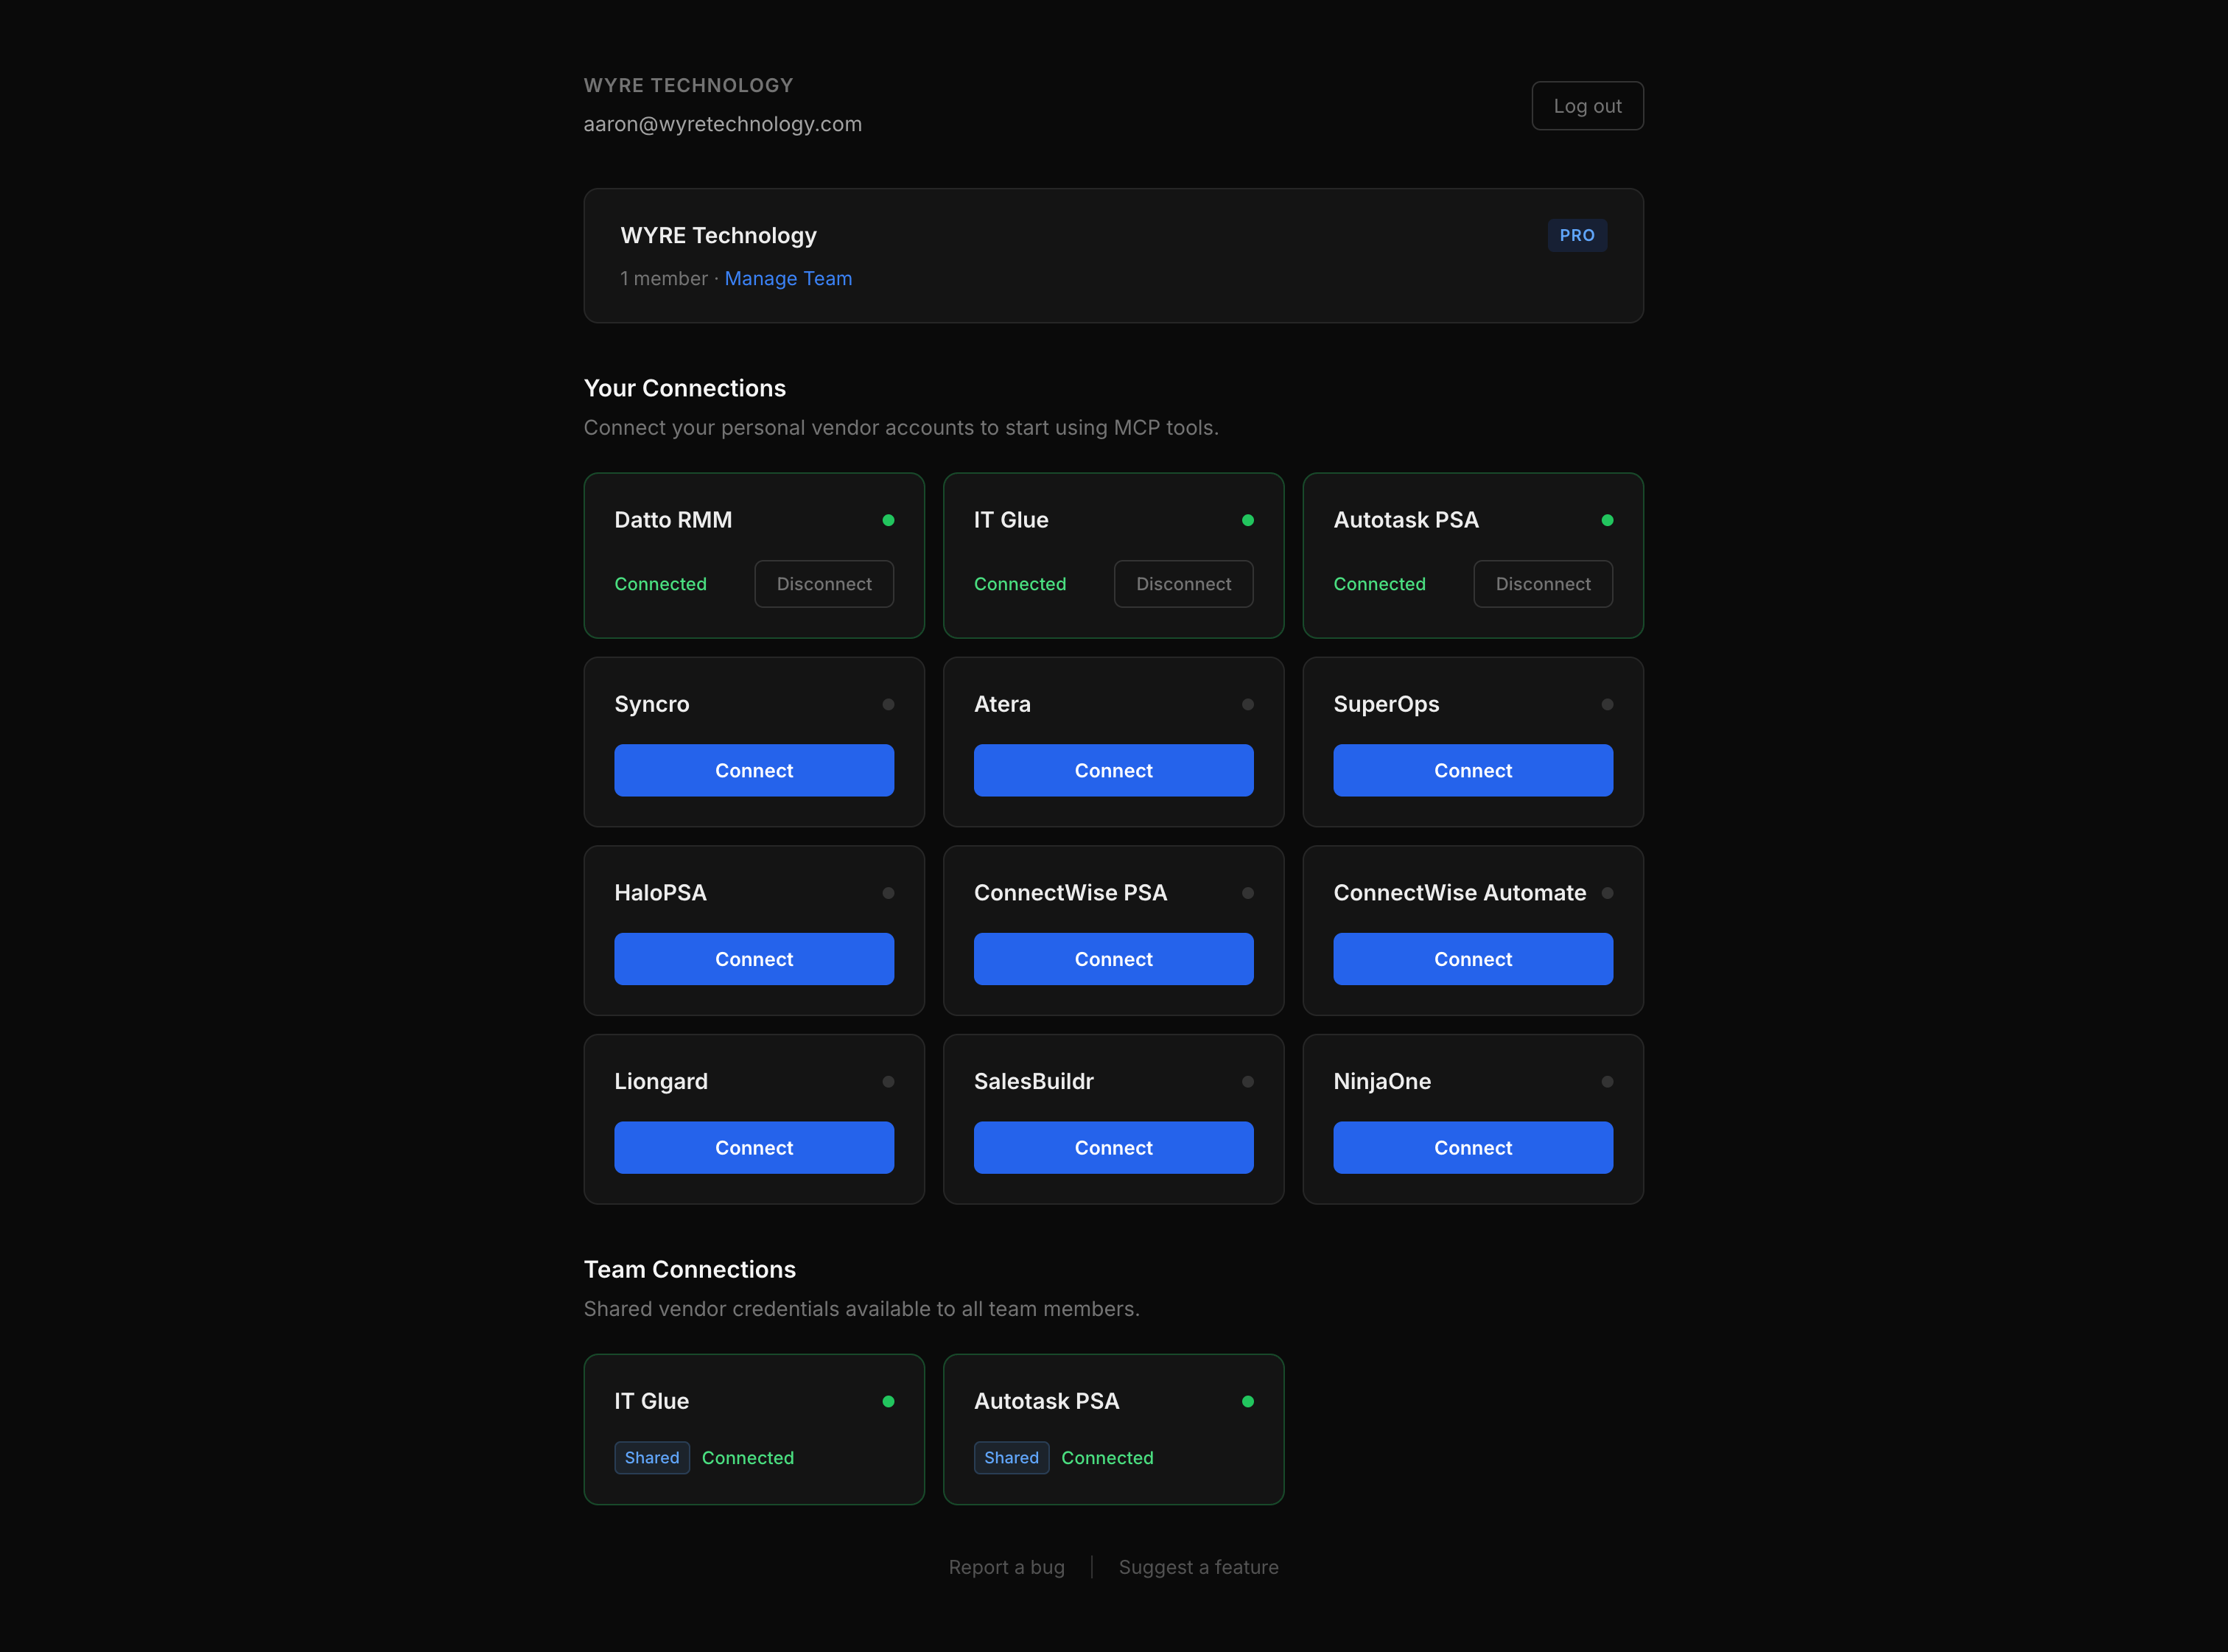
Step 2: Connect Vendor Credentials
There are two types of credentials on the gateway:
- Personal connections — tied to your individual account. Only you can use them.
- Team connections — shared across all team members. Anyone on the team can use them via MCP. Requires Pro plan.
Personal Connections
Click Connect on any vendor card in the “Your Connections” section. You'll see a credential form specific to that vendor (API key, subdomain, region, etc.). The gateway validates your credentials against the vendor API before storing them.
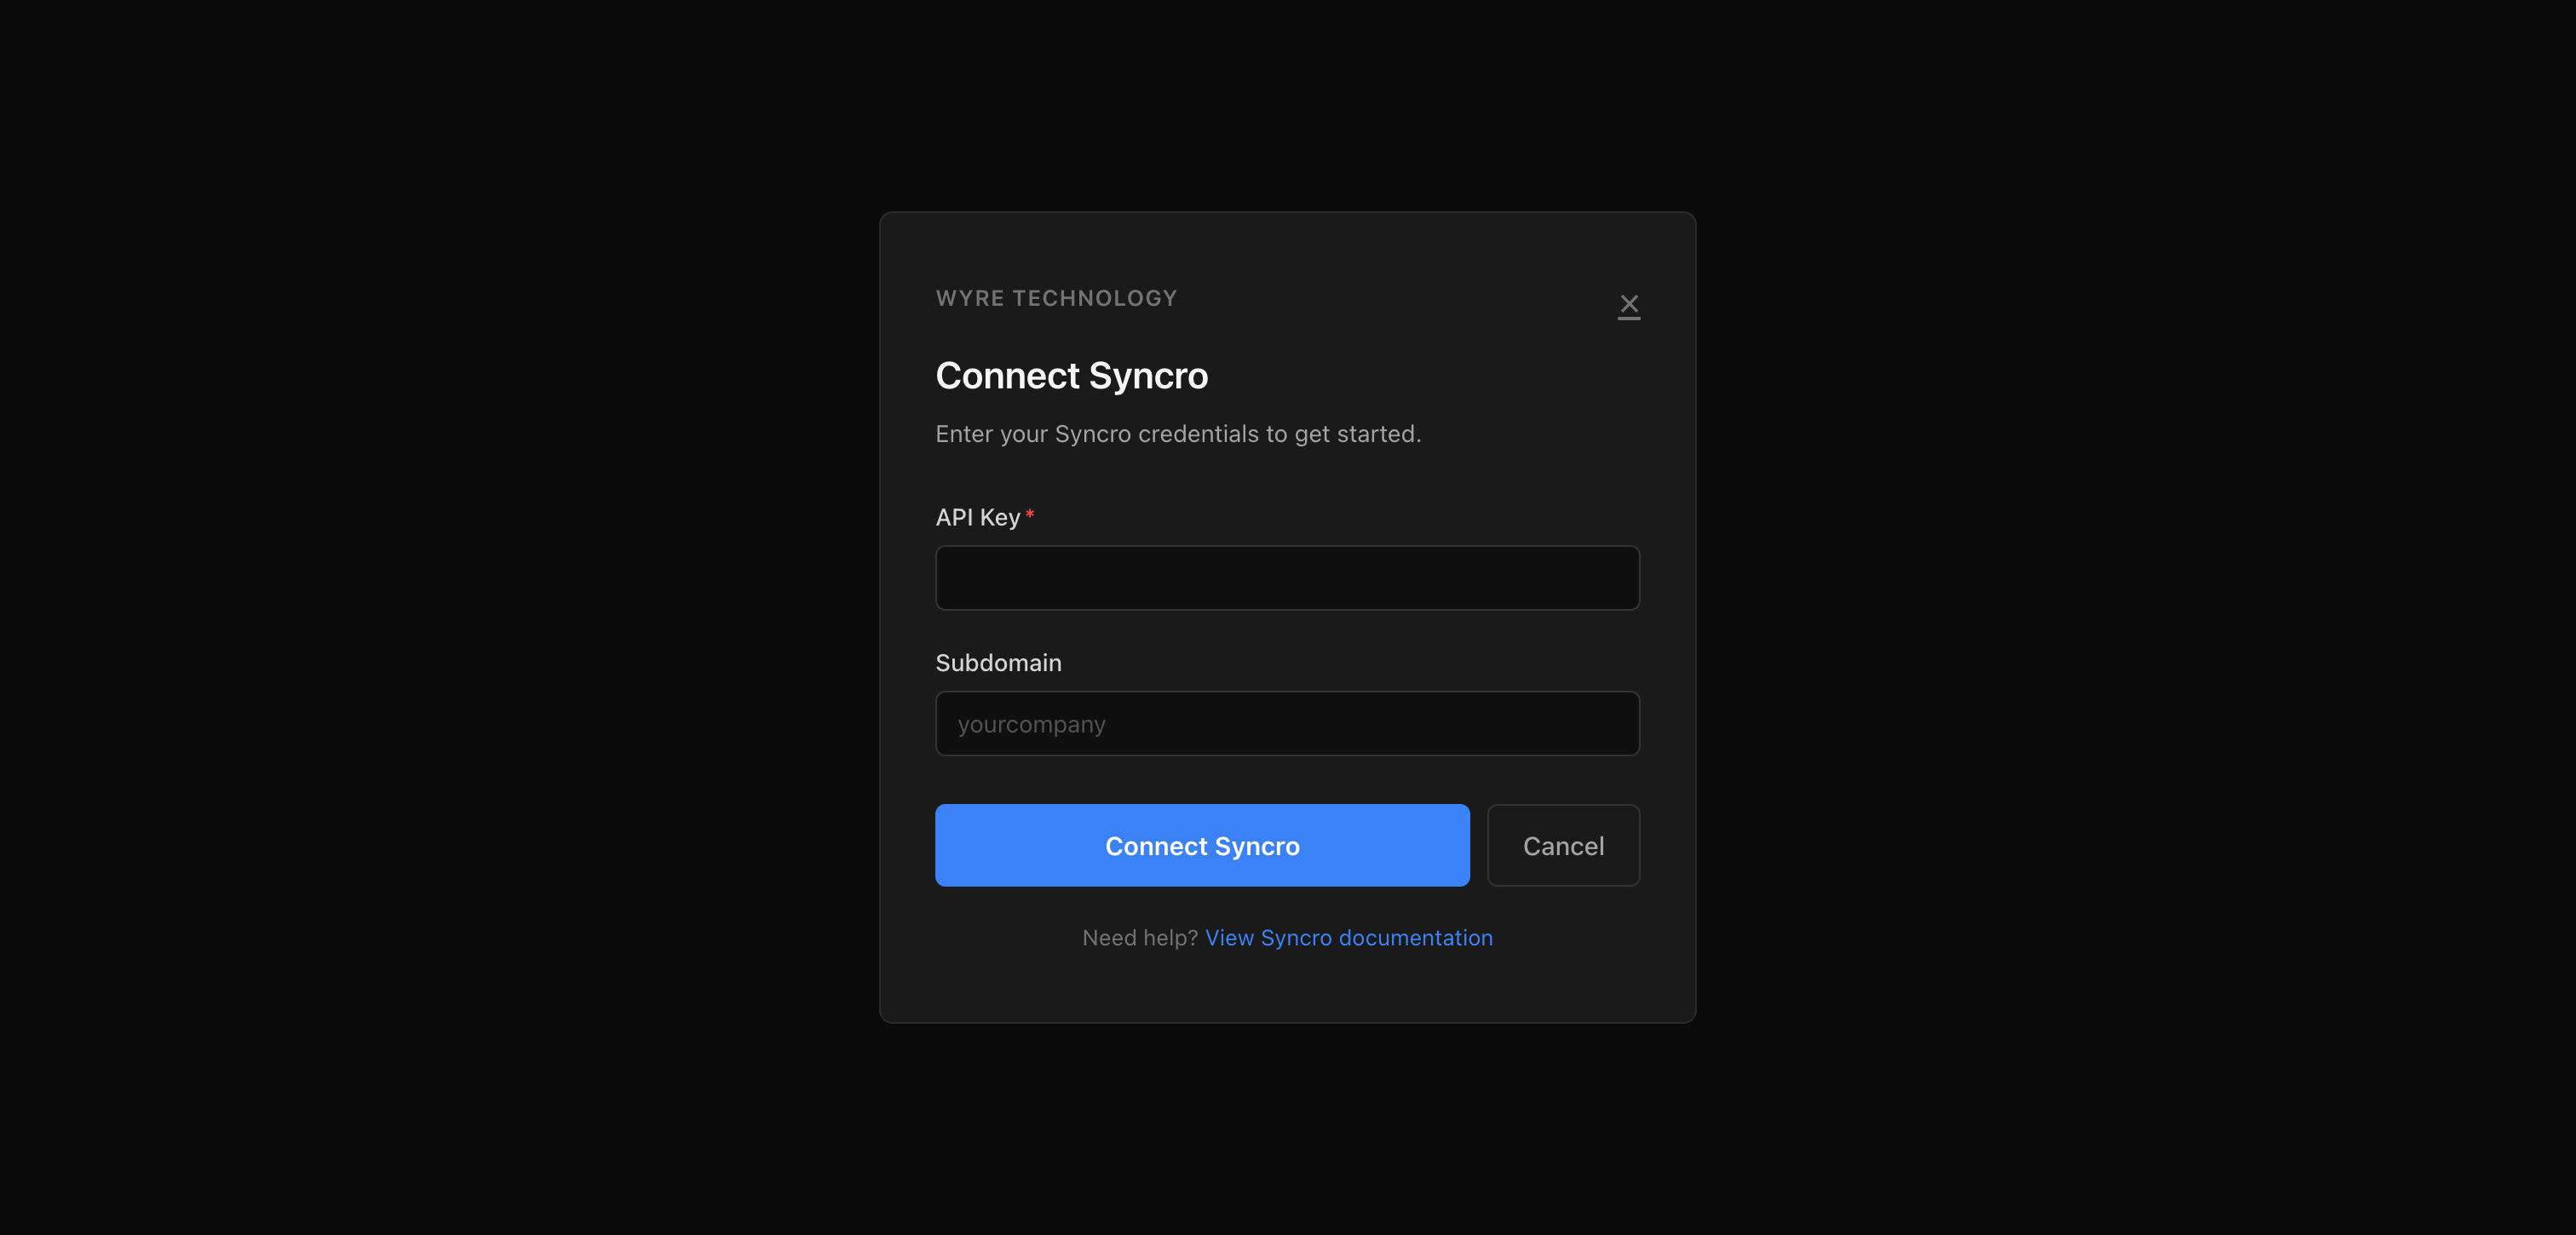
Credentials are encrypted at rest with AES-256-GCM and per-user key derivation (PBKDF2, 100k iterations, SHA-512). Your API keys never leave the gateway — they're injected into requests on the server side.
Team Connections (Pro)
Team owners can add shared credentials from the Manage Team page. Click Connect for Team on any vendor card, enter the credentials in the modal, and submit. All team members will immediately have access to that vendor via MCP.
When both personal and team credentials exist for the same vendor, personal credentials take priority.
Step 3: Invite Team Members
From the Settings page, click Manage Team to open the team management page.
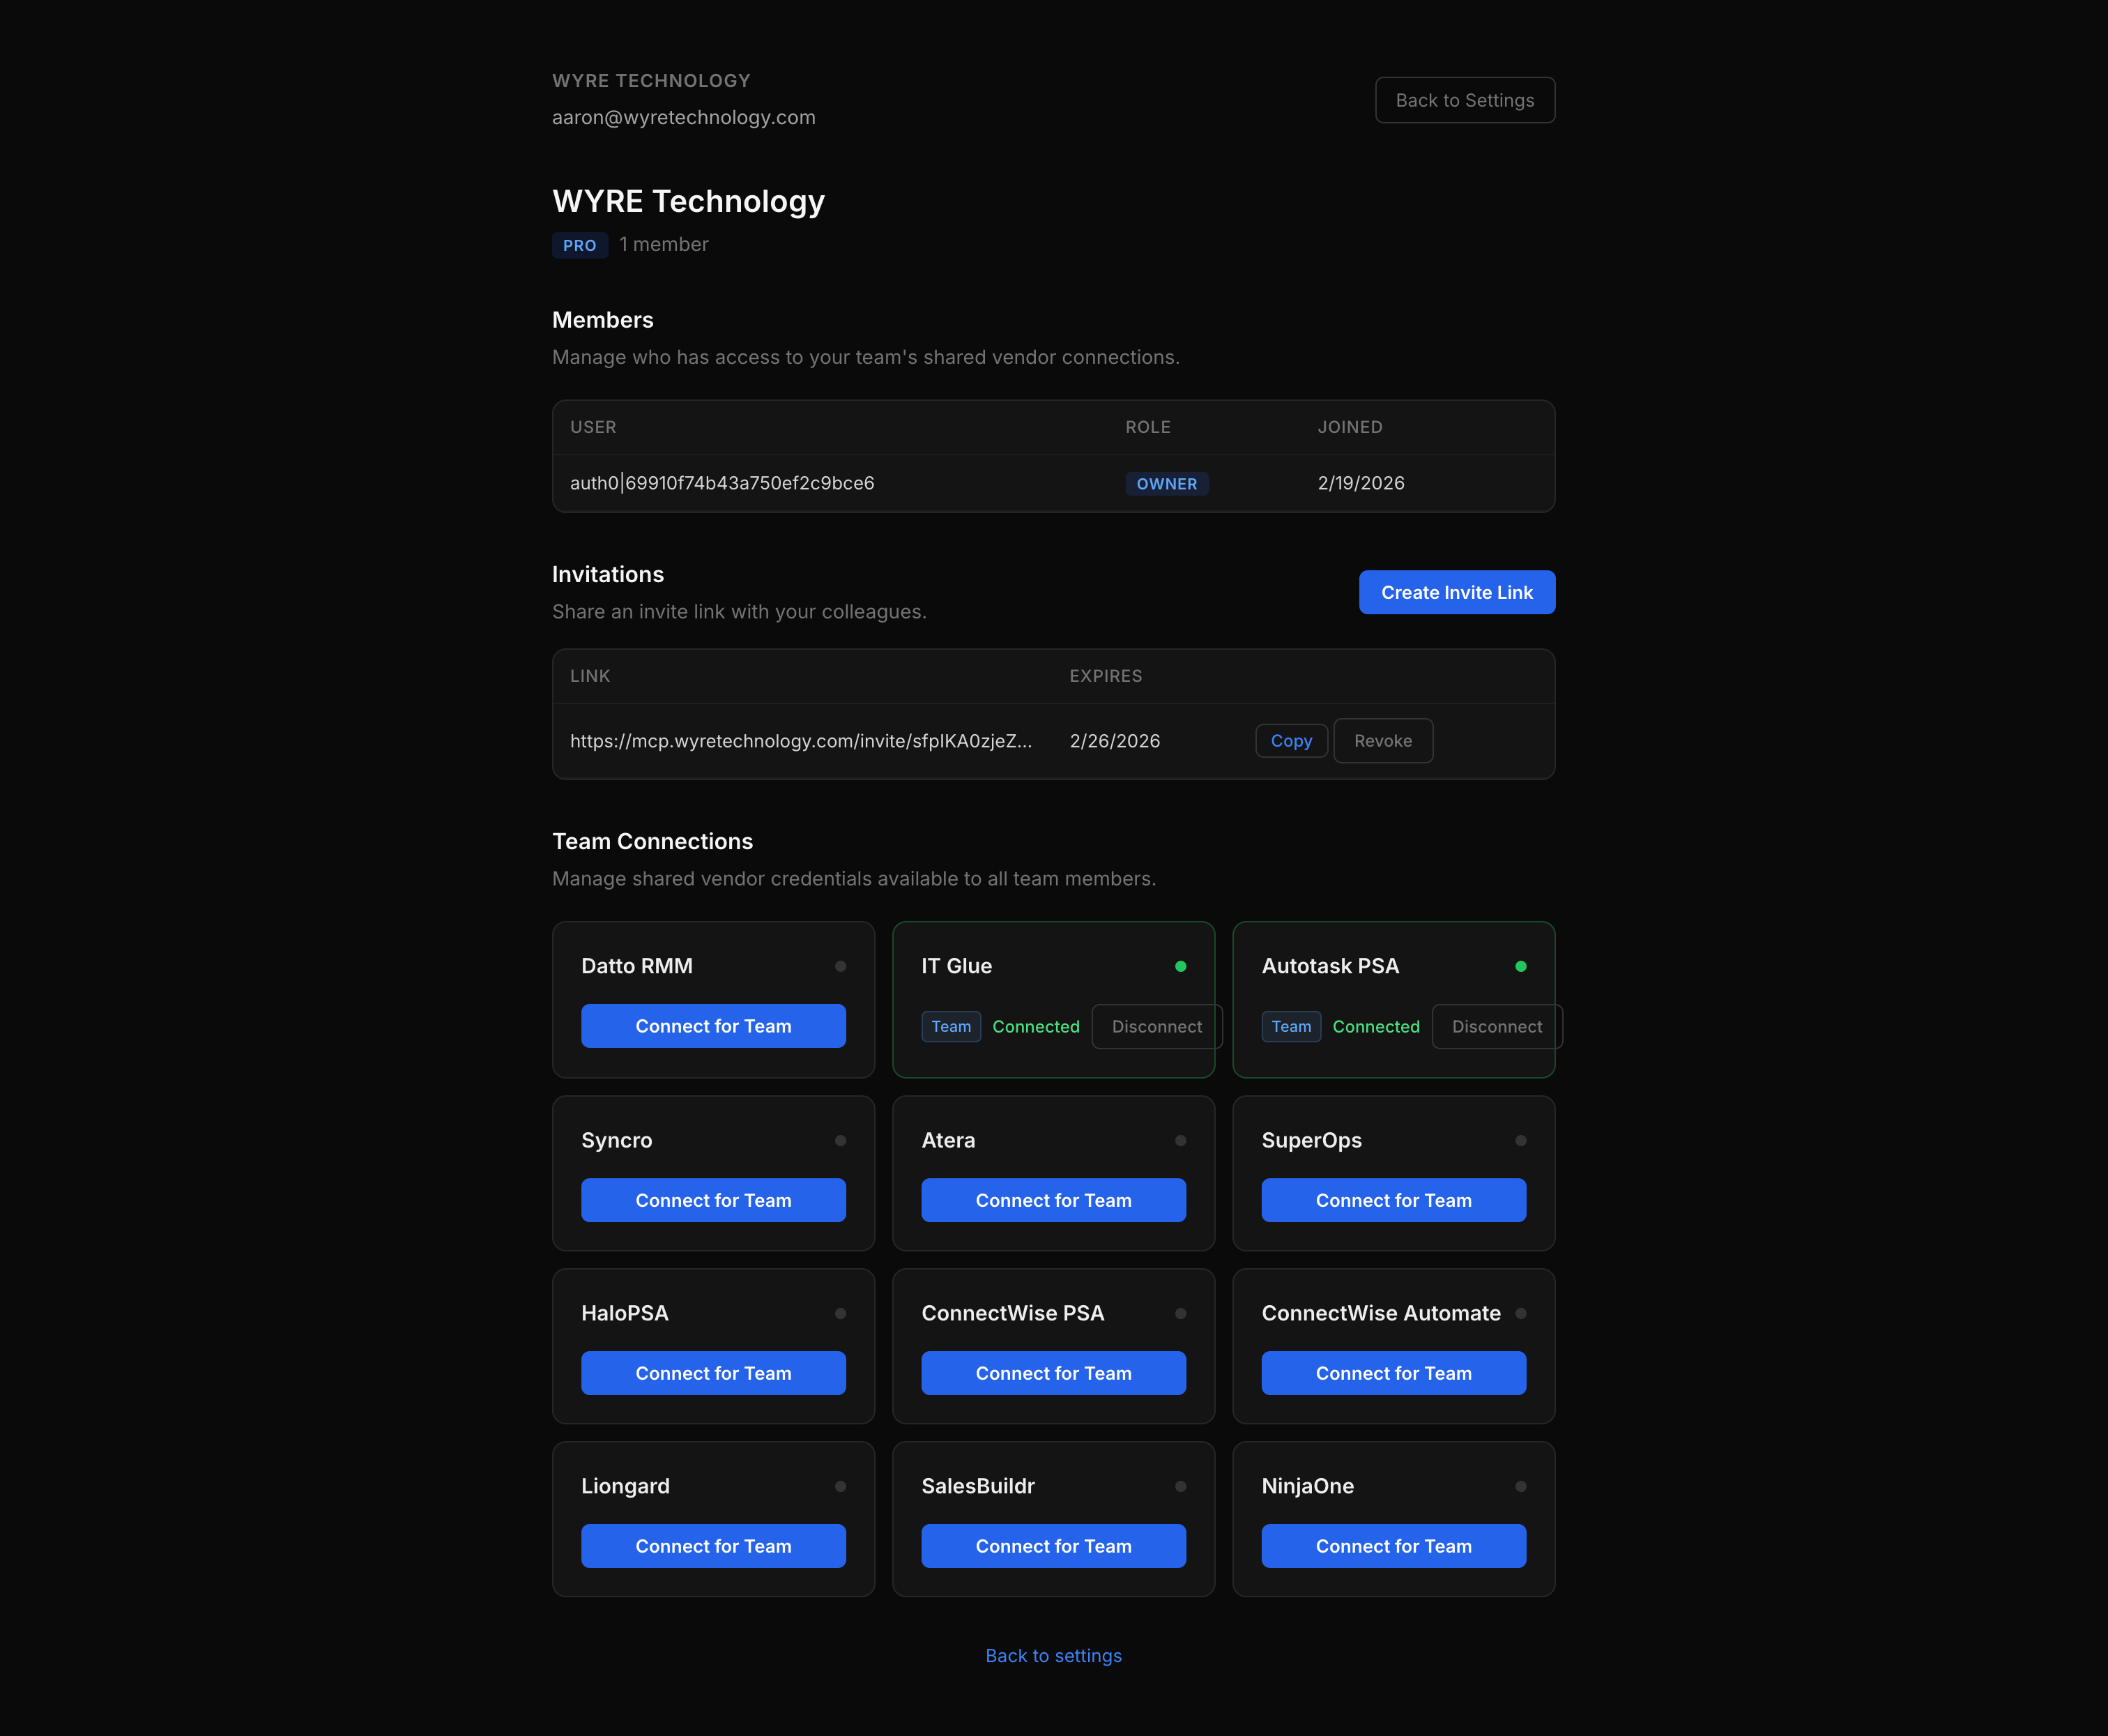
The team management page has three sections:
Members
Lists everyone on the team with their role (Owner or Member) and join date. Owners can remove members from the team.
Invitations
Click Create Invite Link to generate a shareable URL. Invite links expire after 7 days. You can copy the link to share it, or revoke it if no longer needed.
When a colleague opens the invite link, they'll be prompted to sign in (or create an account) and then see an “Accept & Join Team” page. Once accepted, they appear in the Members list and can immediately use the team's shared credentials.
Team Connections
The same vendor grid as the main settings page, but for shared credentials. Only the team owner can connect or disconnect team-level credentials.
Step 4: Connect Claude to the Gateway
Once your credentials are stored, configure Claude to use the gateway as an MCP server. See the Gateway setup guide for detailed instructions, but here's the short version:
Claude Code (CLI)
Add a .mcp.json to your project root:
{
  "mcpServers": {
    "msp-mcp-gateway": {
      "type": "http",
      "url": "https://mcp.wyre.ai/v1/mcp"
    }
  }
}
The unified /v1/mcp endpoint serves all connected vendors through a single
URL. On first use, Claude Code opens a browser for OAuth authentication. After that,
connections are automatic. Tool names are prefixed with the vendor slug (e.g.
autotask__search_tickets, itglue__search_organizations).
Claude Desktop
Claude Desktop supports remote MCP servers natively. Add via
Settings → Connectors, or add to your
claude_desktop_config.json:
{
  "mcpServers": {
    "msp-mcp-gateway": {
      "command": "npx",
      "args": ["-y", "mcp-remote", "https://mcp.wyre.ai/v1/mcp"]
    }
  }
}
Note: Claude Pro/Team/Enterprise users can add remote servers directly
via Settings → Connectors without the mcp-remote bridge.
How Authentication Works
The WYRE MCP Gateway uses OAuth 2.1 with PKCE for authentication:
- Claude sends an MCP request to the gateway URL
- The gateway returns an OAuth challenge — Claude opens a browser window
- You sign in via Auth0 (email/password or social login)
- The gateway issues a session token and redirect URI back to Claude
- All subsequent MCP requests include the session token automatically
- The gateway looks up your stored credentials, injects them into the vendor API request, and proxies the response back to Claude
MCP requests are authenticated with JWT Bearer tokens issued during the OAuth flow. Vendor credentials are never exposed to Claude or transmitted outside the gateway.
Credential Resolution Order
When the gateway receives an MCP request for a vendor, it resolves credentials in this order:
- Personal credentials — if you have individual credentials stored for that vendor, those are used
- Team credentials — if no personal credentials exist and you belong to exactly one team with credentials for that vendor
- Org-level credentials — shared across the entire organization as a final fallback
This means team members can override shared credentials with their own if needed (e.g., a team lead with elevated API permissions).
Credential resolution is separate from tool scoping. The order above decides which credentials are used to authenticate to a vendor; Per-Team Tool Access decides which tools the team can call once authenticated.
Next Steps
- Per-Team Tool Access — restrict which vendor tools each team can call
- Gateway setup guide — full configuration details and supported vendors
- MCP Servers — explore what each vendor server can do
- Plugins — use Claude Code plugins for local, self-hosted access